Category: Sharing Resources

Sketches, Collaborating and Physics in Todays Classroom

I left our latest face to face on Saturday feeling really energized and excited, especially to the concept of renewing my commitment to sharing what I am doing and how that has been helping me within my classroom.

To that end I decided to share a resource I have been sharing with my teammates at SMLS for the past few weeks. It’s made a big difference for me and I hope it is something that can help you! It’s a software called Nearpod.

Basically, Nearpod is a way to put a variety of activities into your pre-existing presentations, and instead of having to share your screen while in a meet or project slides, the presentation is visible to the students on their own devices and it becomes much more interactive. One of the reasons I love it, is that it allows me to change the pace and feel of my lessons. Built check-ins in the form of open ended questions, polls or collaboration boards gives me a really good feel of where my students are and what they are thinking. It lets me know in greater detail how much they understand and if I need to back track or can pick up the pace of a concept.  
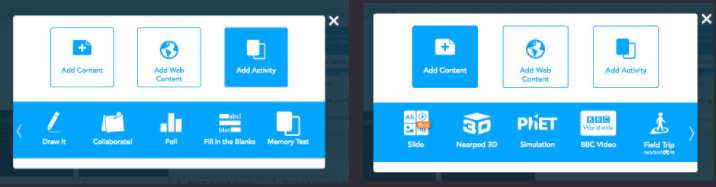
Above, you can see an initial selection of different activities to put in to your slides. There are just so many from taking a poll to using VR to visit Machu Picchu. For me, during remote learning, I was losing a lot of opportunities to have my students collaborate or present more of their tangible thinking. This was especially true when I was beginning to teach forces and force diagrams during my structures unit. This is where this software shines.

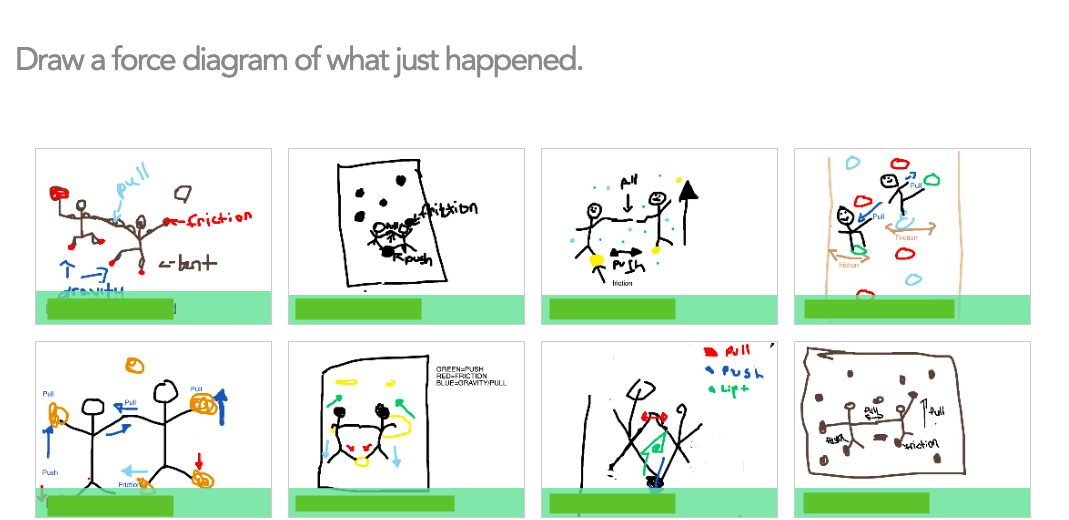
What you are looking at, is the option for students to draw a diagram using Nearpod. In this instance I showed them a video of two people rock climbing together. I then asked my students to consider the forces acting the climbers at any point in time as well as the pushing or pulling that they were doing while climbing.

Normally the girls would have chart paper or big white boards and we would be doing more hands on things when introducing physics, but with Nearpod I was still able to have them put down their ideas and get messy, even if only digitally! My students had a lot of fun and it was something I loved having up my sleeve.

If you are interested in trying this out the biggest thing I want to let you know is, this is not a complex software, you do not have to re-invent the wheel. That’s one thing I find often happens with tech PD is that sometimes there is such a big learning curve it seems impossible or demoralizing. Thankfully this is not the case.

Here’s two ways you can try it, the first is to make your own nearpod account and upload any powerpoint presentations or google slides you may have and from there choose some of the great options of activities to use. This is an option with the free account and something I have used a lot.

Or if you try out their paid service you can download the add-on on google slides and edit directly. This is the way I’ll show in more detail.

From there you can edit and add a lot of really fun options in to your slides.

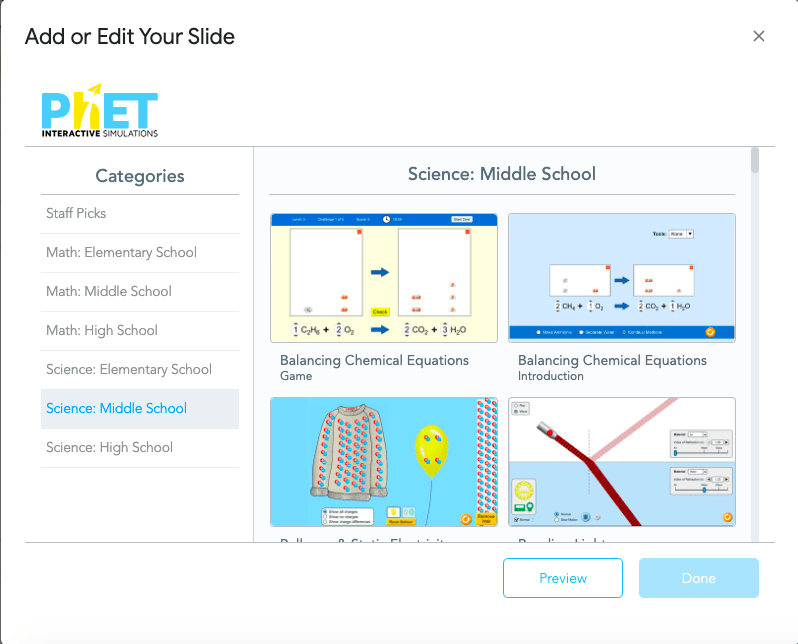
One of my personal favourites is the PhET simulations that allow your students to dive right in and mess around a variety of STEM topics.


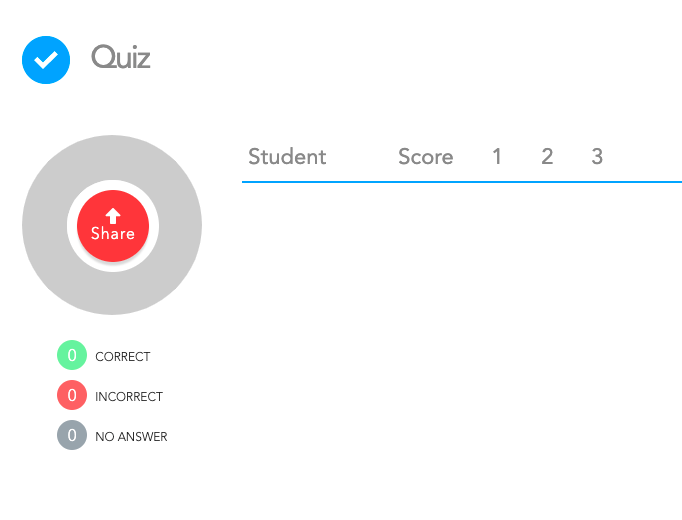
Or if you want to add a small assessment at the end of your lesson you are also given the option to put in small multiple choice quizzes in to your lesson. This includes a build in grade book that assesses the responses for you and allows you to break down your data.


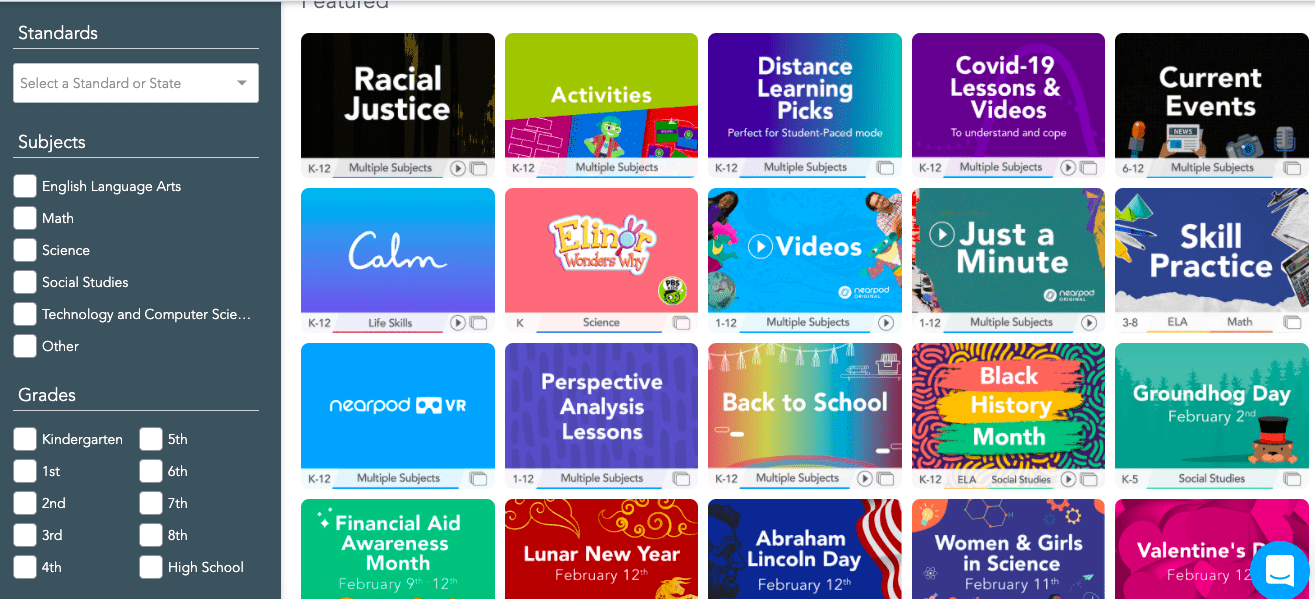
And finally if this is all still overwhelming. Please feel free to just look through a ton of pre-made lessons. There are so many that I use and have a lot of fun with in my class.

I hope you try this out and mess around with this software and I hope it lets you get a little more hands-on and messy in your class than you could before.

Please let me know what you think and I hope you have a fantastic long weekend!

stay healthy helpful and calm


Keep It Simple Stupid

So it’s been quite a while since I posted, and as I had stated before my goal this year was to find ways to keep STEM in the classroom as hands on and messy as possible while learning in this new environment.

This December I was fortunate enough to be sent to the ISTE conference and was blown away by all of the amazing software and ways that people have been able to present information in such cool and engaging ways. I promise I have a post coming for a lot of these resources!

But, as I was looking over all the great resources to share, thoughts kept coming to the back of my mind ‘who has time for this? Who really cares about this right now? Is this really the most important thing to be sharing right now? Is content the biggest concern right now? and though I am excited to share these things and teach people about fun new STEM tools, I think right now it’s best if instead, I share things that have been working right now. Things that have made my students smile and stay engaged in our homeroom that haven’t been a source of stress for me or my students.


  1. Class Jeopardy- A really fun and engaging site, Jeopardy Labs is a website where you can make teams and either play pre-made games or make your own and play with your students. Students can get competitive and have lots of fun. I’ve used it in homeroom and gotten some really fun responses
  2. Quizlet– This might not be new to some of you but I love this website. It’s a way to introduce trivia or review that ensures collaboration. With Quizlet, each team is asked the same question but each student in the team has a different set of answers, this makes it so that students have to talk and share the answers they have and prevents one student from taking charge and answering every question. I highly recommend you check it out if you haven’t as it is a wonderful and easy tool. You can check out pre-made quizzes or even make your own.
  3. This last one might be something some of you disagree with as it’s not educational, but I will say, I had my students laughing, talking and fully engaged playing the game as a group. I have been playing a free game with my students on Friday mornings called Among Us. Some of you may have heard of this game or seen your students playing but for those of you that don’t know, it’s basically a murder mystery set in space, where 1 or 2 students is an imposter and the rest of you try to figure out who it is without getting killed by the imposter. During the course of the game we all were talking laughing and making dramatic accusations while working together. Some of my kids might feel like they’re drowning when looking at an assignment or when they’re sitting alone at home, but at least during this time with me, they are having fun and are still part of a community that can all get together and play. After all, they are still kids, and should have time to be kids.

I realize that some of the things I have shared here are not educational, but all I can say right now is that at this point, content is not king, relationships are. These are 3 ways I’ve been finding ways to have fun with my students that are light and don’t require you to learn or test anything new. I hope you try some of them and share any thoughts or other ways you are having fun with students!

Spooky Video Game Design!

Welcome back to Messy STEM! This week I will be continuing my coding theme and focusing on designing video games. The software I use for this is called Gamemaker Studio 2. Let me start by saying this is an authentic software. It has been used to create a wide variety of popular video games including Undertale, Hyperlight Drifter, and Forager. This software allows games made with it to be published on every platform including Steam, Nintendo and Playstation. That alone I have found is enough to get kids excited. I have yet to have a student not tell me what they’re going to do with their millions of dollars once they upload their games and start selling them.

Whenever I teach this software I am always amazed and motivated by the different and creative things students come up with. They can really dive in to the software and mess around with different coding concepts.

I also want to state that there are a ton of resources for this software made specifically for educators and a lot of great youtube tutorials out there. So, if you finish reading this and want to learn please let me know and I will be happy to share resources I’ve liked, as I learned the software!

Over the course of this post I will be showing a quick run through of how the software looks and some basic things you can try out yourself. I know that I will be glossing over some steps but my main goal here is to show how the software looks/feels and to present you with a resource you might not have known of before this.

The photo below shows what Gamemaker Studio 2 looks like it when you open it up and sign in. For those of you wondering, the software is the same in Windows and Mac, so though I am showing this through Mac you can still learn and try it through Windows

Once you open up Gamemaker, it gives you the option to create a new project with either drag

and drop code options (similar to those on Scratch for example) or GameMaker Language which involves writing the code. I have always preferred the code! It’s what I will be writing about today.


Once you start a new project, don’t be overwhelmed by what you see! This is a professional software but it is very straightforward! Below is a summary of what you will see.

In the spirit of Halloween I thought I would do some spooky examples!

The main things you will work with initially are Objects, Rooms and Sprites. These are all things you will find in the left sidebar above.

Sprites are where you store your artwork for your game. This can include animations and gifs. It’s important to remember that a Sprite is not something you program, it is what you attach to what you have programmed. Below is a photo where I have selected my sprite, a dancing skeleton. In it I have painted a bit over my skeleton’s feet. It also shows the series of images that will be played on repeat to animate my character. In Gamemaker Studio 2 you can design and draw characters within the software or import images from your computer. In this case I used free graphics to upload a dancing skeleton gif. To make a new sprite simply click the Sprite category and select add new sprite.

Rooms are essentially your levels, they are your backgrounds. Anytime your character goes to a new place or a new level, they go to a new room.


Objects are the parts of your game that you actually program.

These would be your characters, bad guys, walls, etc.                                                        Basically, anything you want to respond in any way, you will make in to an object. In this case I have made an object named Skeleton. Once you make the Object (just double click Objects in the asset bar shown above, click and select make new object) you then can attach the artwork you saved in the sprite section, which was my dancing skeleton gif.

Once you make an object you will then be given the option to select it and begin programming! Above you can see my Skeleton and that I have attached the sprite/artwork to it. The next thing that pops up are Events. Events are essentially where you program coding and reactions of your object. 

As I mentioned in my previous post, computers are not mind readers, when programming you need to consider every aspect of what you want to happen. In this situation I want my character to move to the right when I press the right arrow key. So to do that I clicked Add Event, and Key Press, then Right. After that you will see on the right the place where you can type in your actual code. To keep things simple I wrote in ‘speed = 2;’

What I have basically said is, when I press the right key I want my skeleton to move to the right at a speed of 2. If I wanted him to move to the left I would do select left arrow key and have the same code but my speed would be -2.

The next thing I did was work on my room, I decided to create a spooky sprite and select that as the background in my ‘Room’. After making my room, the next thing you can do is drag your objects in to your room. You can then press the play button on the top bar to run the software and see what the game looks like!


Here is a sample of what our spooky skeleton looks like.

This was just a basic run through of some simple concepts. Often I start this software by teaching students to make a game of tag where characters throw food at each other. In it we can do different things like set up a score and special affects. Here is another silly sample! 

That being said you can easily go much deeper into this software. You can challenge your students to define and set their own variables and even define constants. Below is an example of a more complicated platformer game I have been messing around with based on some online tutorials. I also have a photo of an array I started that will allow my character to have an inventory!

I understand that this was a big post with a lot of information, but if I have interested you at all in this software and you want to try it out in your school please feel free to reach out to me and I will be happy to share resources and ideas. I also highly recommend the educator resources that this software offers.

I really hope you are all having a great week and that you have a great Halloween. My goal this year is to help you all get back into a hands-on STEM class where you can get messy, build things and break them. I believe this software is a great tool for that and I hope that it helps you as well!

Bitmoji Image